Add Custom View to SafeArea in SwiftUI
Discover how to inset a List content using a dedicated ViewModifier in SwiftUI. How to add a button at the bottom of a List.
• 2 min read
Availability
iOS 15
iPadOS 15
macOS 12
Mac Catalyst 15
tvOS 15
watchOS 8
visionOS 1.0
In the Apple ecosystem, the safe area is the designated region within a view that is not covered by elements such as navigation bars, tab bars, toolbars, or other views.
SwiftUI views respect safe areas automatically, but sometimes you might need to place content inside this safe area too.
In this situations the safeAreaInset modifier will come in handy.
The safeAreaInset view modifier
The safeAreaInset view modifier allows you to expand the safe area by placing custom content inside the original safe area of the view.
Its declaration has 4 parameters:
- edge: defines the edge to inset by the size of content, to make space for the content
- spacing: it’s the extra distance placed between the two views
- alignment: the alignment is used to position content inside the safe area
- content: it’s a view builder function that provides the view to display in the safe area space
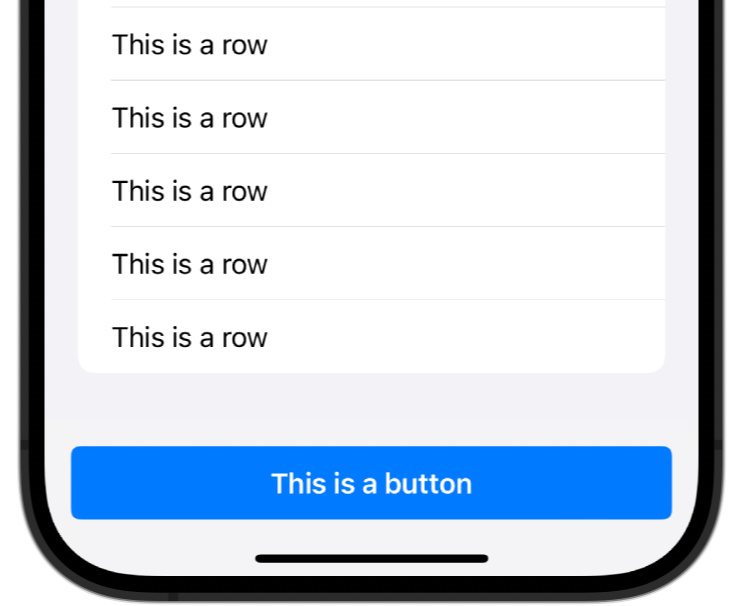
This modifier is especially useful to inset the content of a List, like in this example.
struct SafeAreaInset: View {

  let data = Array(repeating: "This is a row", count: 20)

  var body: some View {
    List(data, id: \.self) { string in
      Text(string)
    }
    .safeAreaInset(edge: .bottom) {
      Button("This is a button") {
        // Some action...
      }
      .buttonStyle(FullSpanStyle())
      .padding([.top, .horizontal])
      .background(.regularMaterial)
    }
  }
}
Here, safeAreaInset makes it really easy to place a Button at the bottom of the List and to adjust the List content insets, making sure that no content is covered by the Button.
Conclusion
This is just one way that SwiftUI provides to manage the safe area and it is a really easy and clean one.
If you have any question about this article, feel free to email me or tweet me @franceleonidev and share your opinion.
Thank you for reading and see you in the next article!
Share this article